Apple Teacher - iMovie |

|
|
Ever since I found a way to draw on the computer, (around the early 2000s, I think) I have been interested in animation. I used to look up videos on how to make a character blinking animation just for fun. Because of this, I was a little familiar with how to create a video using Windows Movie Maker (WMM), but I have never tried out iMovie before. Let me tell you: iMovie has way more effects than WMM ever had, and it looks way more professional in my opinion. I have learned that I can do a creative variety of things using iMovie!
|

|
First of all, as with a lot of iPad starting guides, this book contained both a written and video component to most if not all of the skills listed in chapter 3. This is great for those who need a visual demonstration of the skills they want to master. I, for one, definitely appreciated the videos. Sometimes it’s easy to get confused just reading the directions.
|
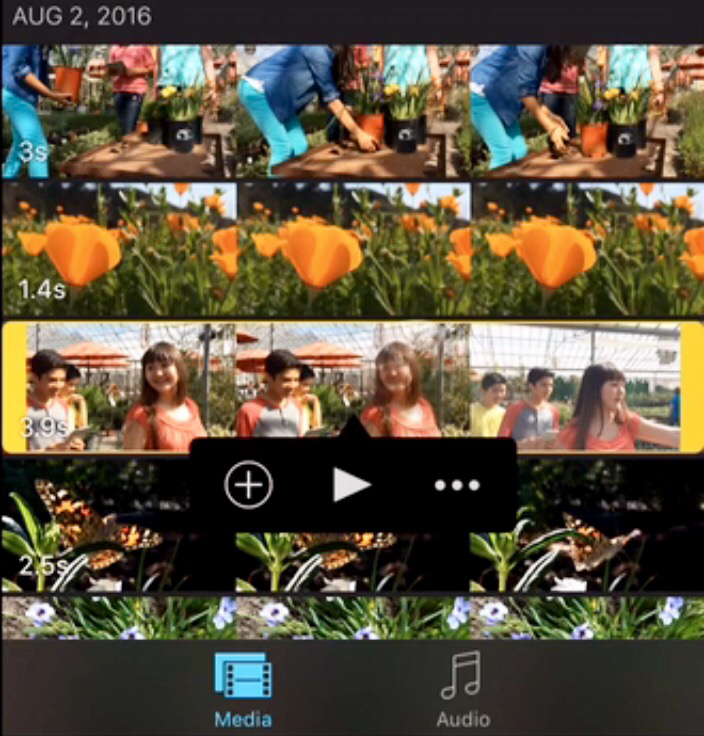
One thing I haven’t tested out in WMM is compiling video clips to create a movie. I had always just used still pictures of drawings that I made to create an animation. Therefore, I had no experience adding video clips to a timeline. It is so easy to do this in iMovie! You just select the movie clip you would like to add, click the plus button that appears, and it adds it to the timeline. From there, you can tap and hold the clip to move it around the timeline. You can also shorten the clip by pressing and holding the end of the clip, then dragging it to the desired time. I just thought that feature was very neat and easy to do. |
|
Another thing I found particularly spectacular was a feature called the “Ken Burns effect”. This effect is achieved by first adding a picture to your timeline. You can tap the image to access the controls of the Ken Burns effect. This will cause the image to slowly zoom out as the video goes on. The thing is, you can edit that zooming out effect! You can’t do that in WMM as far as I know. You can pinch the screen on the picture to pick the starting point of where you want it to zoom out from. This way, you can draw attention to a certain section of the picture.
These video clips are exceptionally customizable. You can split big clips into multiple smaller ones, add text to your movie, split the screen between two clips or pictures, add sound effects, and much more! I especially loved how you can add theme music to the movie you create. I cannot wait to edit a movie in iMovie just for that aspect of it. Not only can you add theme music, but you can add a voice over as well! I found that to be incredibly helpful; I can only imagine how much content that can add to a movie.
To wrap it up, there are too many amazing features of iMovie to name. It is certainly more modifiable than Windows Movie Maker in my opinion by far. I highly encourage you to read the iMovie guide and experiment with the iMovie app. I am certain that you will have a ton of fun doing so!